
This is a walk through on setting up a biddable ad campaign on Provi. Provi has partnered with Carrot Ads, powered by Instacart to run biddable campaigns on our marketplace. To learn more about Provi’s partnership with Carrot Ads, check out the article Biddable Ads 101: An Introduction to Promoting on Provi.
Provi provides several ways of running ad campaigns, each better suited for buyers at different stages of the buying journey.
A display ad targeted at buyer behavior can work great when the goal is to generate awareness. A sponsored product ad targeting buyers searching for a specific type of product likely reaches higher-intent buyers to better increase sales. Because of these different opportunities to play a role at different stages of the buyer journey, ad campaigns can be optimized by the choice of tactics for different objectives.
What Objectives Does Provi Support?
We have identified two primary objectives that encapsulate the goals of our brand partners when they advertise on Provi: increase reach and maximize sales. We’ve selected a combination of campaign tactics to best achieve these.
Reach & Awareness. Engage trade buyers as they begin shopping with high-visibility, top-of-page placements to grab their attention as they are building their orders. Market and premise type targeting will ensure brands reach the RIGHT buyers on Provi, in the right PLACE.
Maximize sales. Secure premium space in front of trade buyers and get products into carts. These campaigns are where the rubber meets the road, so to speak, and where many brands start when first advertising on Provi.
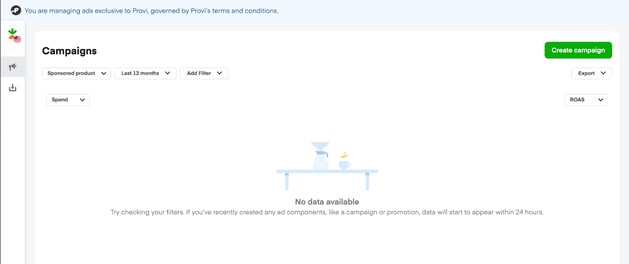
Starting a New Campaign
Within the account dashboard, click the green "Create Campaign". If unable to locate the "Create Campaign" button, click the megaphone / “campaigns” option at the top left side of the page.
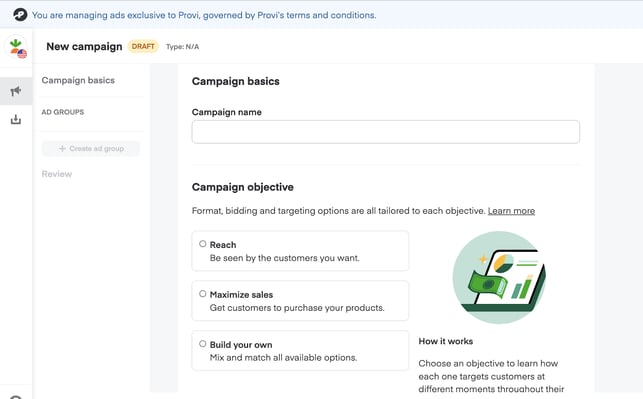
Campaign Basics
First things first, pick a campaign name. Use a name that will help you identify the details of your campaign, like “Whiskey_Sponsored Product”. Next you will choose your campaign objective - reach or maximize sales. Selecting Reach will create display ads which represent creative display ads on search and category pages. Selecting Maximize sales will choose product ads which represent specific product promotion in product categories and relevant search results.
Carrot Ad offers multiple strategies for your advertising campaigns:
Budget Type
Reach - if you are running display ads, you choose a lifetime budget. You have two options when it comes to your pacing strategy:
- Distributed: this distributes your lifetime budget throughout the duration of your campaign. Spend may vary slightly day to day, but this is the best option if you’d like your budget to last for a set period of time (ie promoting a new product for two months)
- Accelerated: this spends your budget as fast as possible and exhausts your lifetime budget sooner. If your goal is to get eyeballs on your ad, this is the best option.
Maximize Sales - if you are running product ads, you have additional budget options:
- Lifetime budget (same as above)
- Daily budget: set how much is spent on a daily basis, with the ability to include a campaign lifetime spend limit.
You also have the option to set a campaign start and end date. Note that campaigns go live at 12:01am PT on the selected start date.
Ad Groups
Ad groups are part of your overall campaign and where you start to flush out your strategy and details. Your options depend on the type of ad you are running.
Reach / Display Ads:
- Select an Ad group name - again, keep this descriptive to help you track campaign performance
- Provide the landing page URL where customers will land after clicking your ad
Set your bid - Select keywords you’d like to target
- Select buyer license type (on-prem, off-prem, or combo)
- Select the states you would like to target
- Upload your banners (link to article about banners)
- Select product lines to advertise
Maximize Sales / Sponsored Product Ads:
- Select an Ad group name
- Select the products to advertise
- Choose your default maximum CPC bid (more on that below)
- Select keywords to target for your sponsored products. Note that Carrot Ad may automatically target related keywords in addition to the ones you choose to help your ads reach more people
- Select buy license type (on-prem, off-prem, combo)
- Select the state you would like to target
After selecting your criteria, you will have the opportunity to review your ads before launching.
Selecting A Maximum Cost Per Click
The Ad Platform is auction-based, so products will be shown to prospective buyers only if a combination of the product relevancy and the maximum bid is high enough. The more relevant the product is to the buyer browsing the marketplace, the less will be needed to bid in order to win the auction and have the ad shown to the buyer. If the product is of similar relevancy to other competing products, make sure the maximum bid exceeds the competitors' bids in order to win the auction.
The maximum bid amount is the maximum a supplier is prepared to pay to have an ad viewed or clicked on by a buyer. The actual amount to pay for an impression or click is dynamic and based on several factors. The main factor is what competitors are paying. The maximum price ever paid is an increment more than the maximum bid price of the bid beat in the auction.
Launching A Campaign
If you are launching a display campaign, you will need to submit your creative for review. On the Submit for Review page you will choose which ad groups you’d like to submit, and then click Submit for Review at the bottom. Reviews are complete within 3 days after submitting.
If you are launching sponsored product ads, you’ll have the option to review your campaign and then click “Launch” and your campaigns will go live within 60 minutes.
The last step is to check the terms and conditions box and launch the campaign. Once the "Launch Campaign" button is selected, the campaign is sent to Provi for review/approval. Within 3 business days, a Provi team member will review and either reject or approve the campaign. If rejected, the team will provide a reason for the rejection. If this is the case, simply expand the campaign in the Campaign Manager to see the feedback and then ‘Edit’ the campaign to action the amends required. If approved, the campaign will go live on the selected start date.
Comments